

Accounts & owners
Step 3 of 4. Do this once every document has finished processing, before you verify and before you export.
What this is for
Section titled “What this is for”While Ordernize reads your documents it collects every name it finds: account holders, businesses, trusts, institutions, property addresses, vehicles.
It cannot tell, on its own, whether “Cobalt Ridge Holdings LLC” is a business the husband owns or an unrelated third party. That decision changes which folder its documents file into, and therefore what your Inventory of Documents looks like.
That is all this screen does: you tell it what each name is, and the documents move accordingly.
When you do it
Section titled “When you do it”After the case shows processed and before you generate reports.
The three queues
Section titled “The three queues”Open the Accounts & owners tab. The work is split into queues, shown as tabs across the top. A tab carries a number when it still has unresolved items, and no number when it has none.
| Tab | What is in it | Required? |
|---|---|---|
| Names | Names waiting for you to say what they are | Yes |
| Possible duplicates | Two folders that may be one account, or two spellings that may be one name | No |
| Account changes | One account that appears under two numbers | No |
A tab only appears when it has something for you. A case with no duplicates and no renumbered accounts shows Names alone, and that is normal. Account changes is the one exception: once you have confirmed an account link it stays on screen without a number, because that is where the undo lives.
Only Names blocks the step. The other two are suggestions, and each says so at the top: “Suggestions are optional and can be reviewed later.”
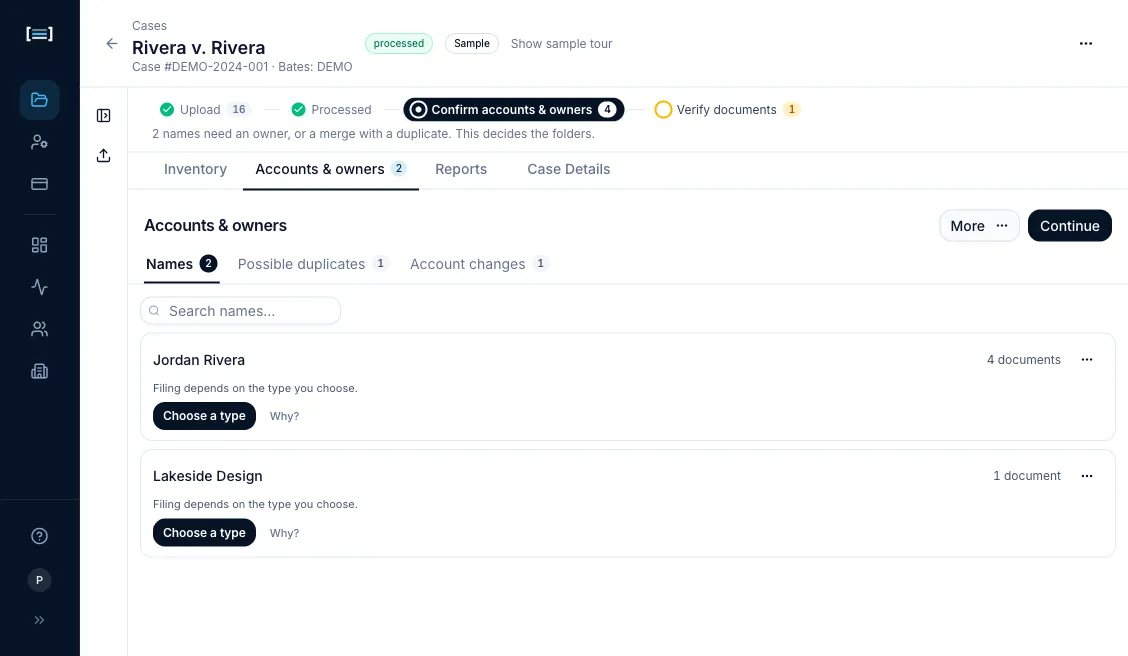
Working the Names queue
Section titled “Working the Names queue”Each row is one name. It shows the name, how many documents it affects, and what the decision will do to your filing.
- Read the suggestion line. When Ordernize is confident, it names a type in words — “Suggested: Trust” — and the row leads with a single button that confirms it: Confirm Trust, Confirm Related Entity, and so on. Clicking that button is the whole decision.
- To choose something else, click Choose another type. The five types appear beneath the row. A row with no suggestion has no confirm button and leads with Choose a type instead, which opens the same five.
| Type | What it means |
|---|---|
| Party | A spouse in this case |
| Related Entity | A business or organization a party owns or controls |
| Trust | A trust that holds assets |
| Child | A child of the parties |
| Third Party | A person or entity outside the case |
- Use Why? when the suggestion is not obvious. It names the document types the name appears in — “Appears in Credit Cards (2), Vehicles (1)” — which is usually enough to tell a person from a business. Click Hide details to close it again. For the filenames themselves, click the document count at the right-hand end of the row.
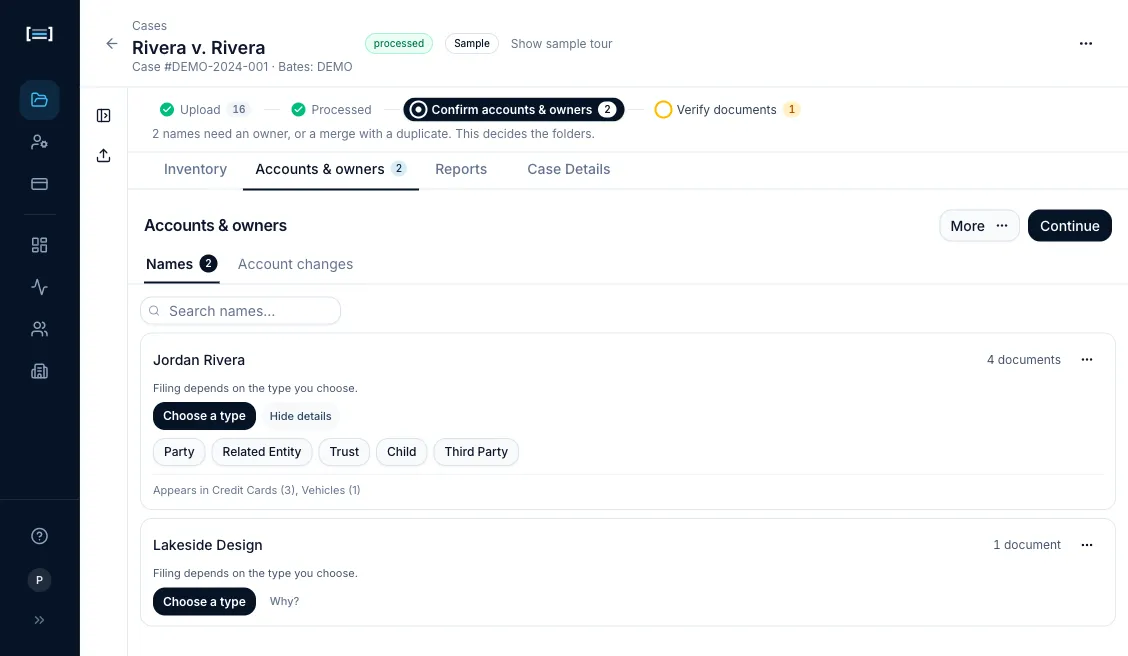
The line above the buttons tells you what the choice does. “Files with: Trusts” and “Files with: Related Entities” mean the documents move to that category. “Files stay in current folders” means the type is recorded but nothing moves. Party, Child and Third Party do not re-file anything on their own.
- Choosing Related Entity does not finish the row. An Owned by picker opens underneath so you can say which entity it sits under, and the row stays in the queue until you press Save. Leave it at the top level if it has no parent. Cancel backs out without recording anything.
- When the queue is empty it says so, and offers the other queues if any are left.
- Click Continue.
If names are still unresolved, Skip remaining owners? appears and tells you how many. Keep classifying returns you to the queue. Skip and continue moves on, and those names are left out of your Inventory until you come back.
Corrections on a single row
Section titled “Corrections on a single row”The row’s own menu, labelled More actions for the name, holds Rename, This is actually… and Delete…. Those are for fixing a name rather than classifying it. See Maintaining names.
Everything else lives under More
Section titled “Everything else lives under More”More, next to Continue, opens the rest of the screen. Each entry opens a sub-view with a Back button that returns you to the queue you came from.
| Entry | What it is for |
|---|---|
| Completed names | The names you have already decided |
| All names | Every name, including institutions, properties and vehicles |
| Recently deleted | Names you removed, and a way to restore them |
| Add name | An entity you know about that no document names cleanly |
| Merge names manually | Fold two spellings into one, by hand |
| Linked accounts | Account links you have confirmed, and their Undo |
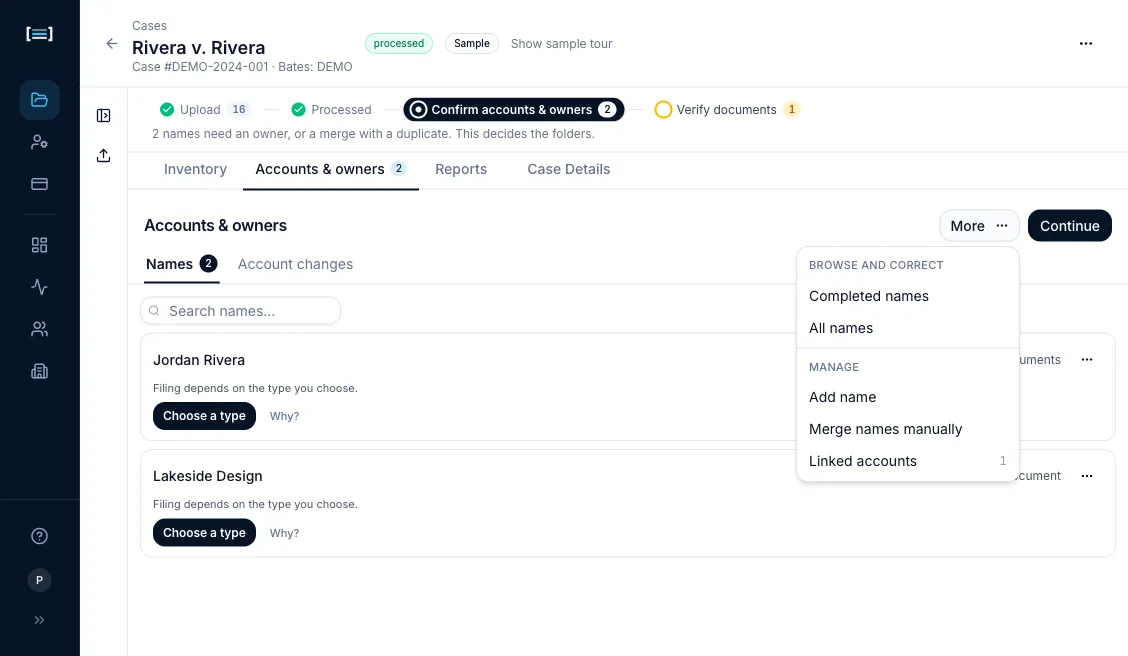
Recently deleted and Linked accounts only appear once there is something in them. If you have deleted nothing and linked nothing, the menu is the four entries above.
What good looks like
Section titled “What good looks like”- The Names tab has no number on it and the queue reads “Every name has been classified”.
- Back on the Inventory tab, related-entity documents now sit under 18. Related Entities and trust documents under 17. Trusts, each under the entity’s own name.
Next: Merging duplicates · Account changes