

Uploading documents
Step 1 of 4.
What this is for
Section titled “What this is for”Getting the case file into Ordernize. You can drop in loose files, whole folders, or ZIP archives. You do not need to sort or rename anything first. Sorting is the software’s job.
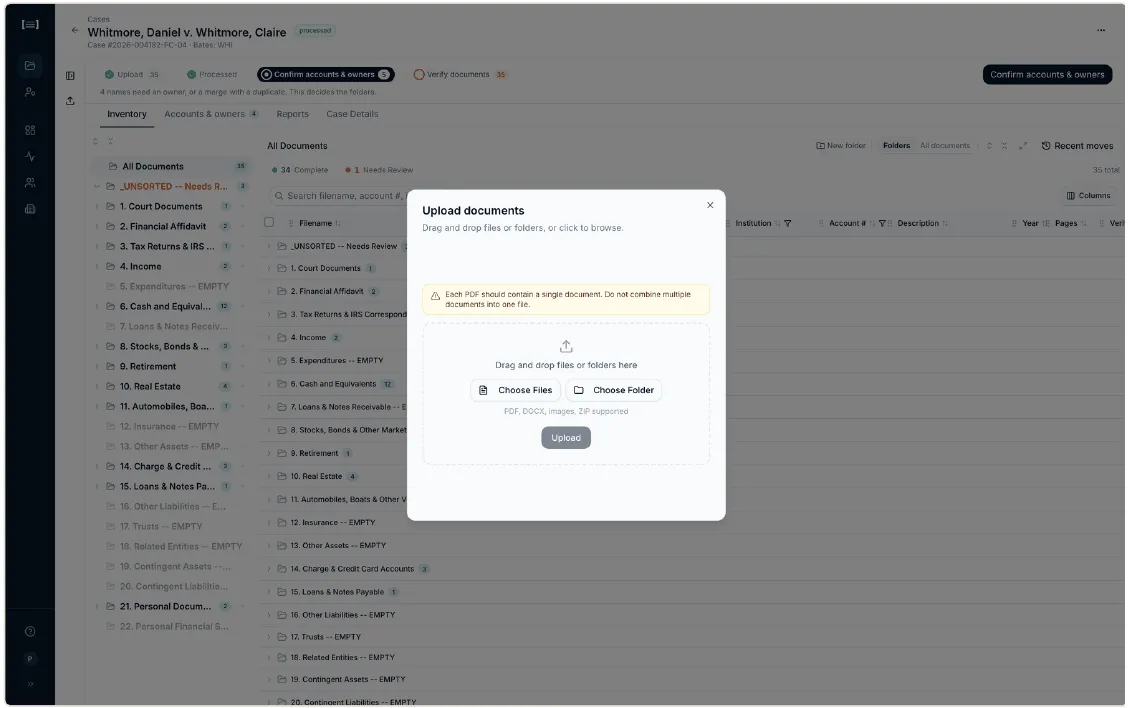
- Open the case and click the upload button (the icon on the left edge).
-
Add the documents, three ways:
- Drag files straight from your computer onto the dashed area.
- Drag an entire folder onto it. Ordernize walks the whole folder tree, including subfolders. See the filename warning below before you do this.
- Choose Files or Choose Folder to browse instead.
ZIP archives are unpacked automatically.
-
Click Upload.
-
Leave the tab open until the upload finishes. Once uploaded, processing continues on the server and you can close the tab.
What Ordernize accepts
Section titled “What Ordernize accepts”PDF, DOCX, DOC, TXT, RTF, ODT, JPG, JPEG, PNG, TIFF, TIF, XLSX, XLS, CSV, PPTX, ZIP.
Anything else in the folder is skipped. Ordernize tells you how many were skipped, but not which ones, so if you are reconciling against a production index, check the count against what you sent.
Limits per batch
Section titled “Limits per batch”- 500 files
- 500 MB total after ZIPs are unpacked
Larger productions go up in several batches. There is no limit on how many batches a case can have.
What good looks like
Section titled “What good looks like”- The document count on the case matches what you sent.
- Anything skipped was skipped for a reason you recognise (a
.msg, a stray.DS_Store). - Documents begin moving through processing on their own. You do not have to start anything.
Next: Processing and retries