

Creating a case
Before step 1.
What this is for
Section titled “What this is for”A case is the container for one matter: its documents, its folder structure, its Bates numbering and its reports.
- From the Cases list, click New Case.
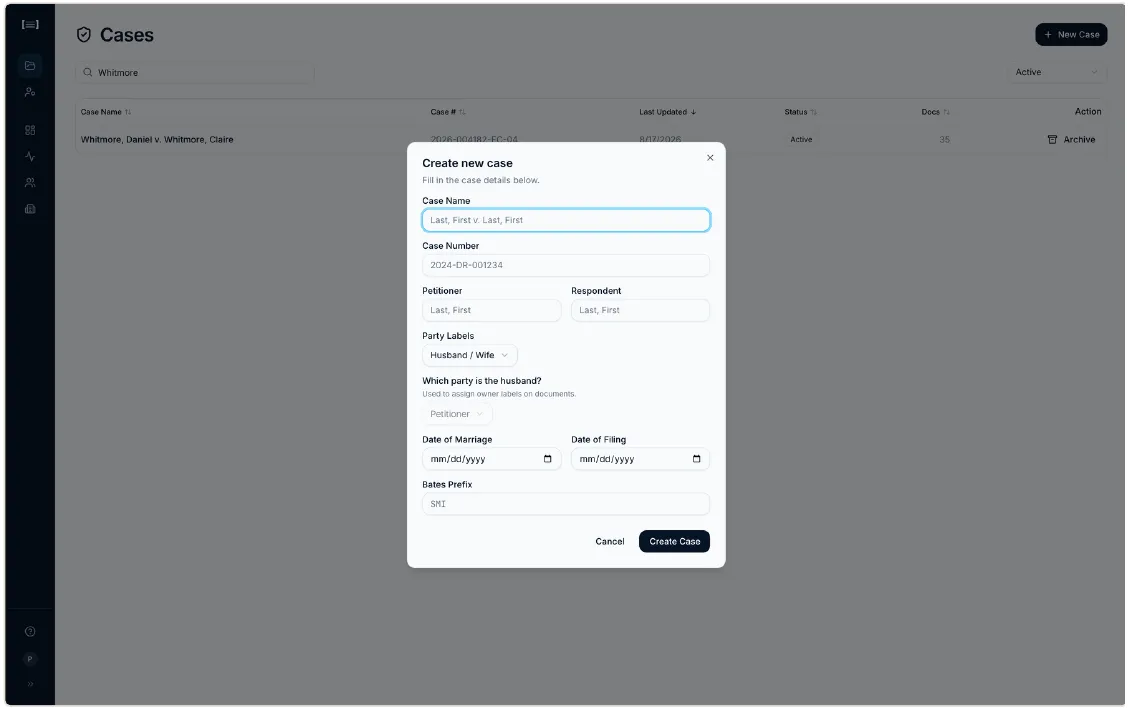
- Fill in the case details.
| Field | Notes |
|---|---|
| Case Name | Must be Last, First v. Last, First — two sides separated by v. or vs., each with a comma. A caption like In re Marriage of Whitmore is rejected and the case will not be created. |
| Case Number | The court’s number. |
| Petitioner / Respondent | Last, First. These names are how Ordernize recognises the parties on documents. |
| Party Labels | How parties are labelled throughout: Husband / Wife, Petitioner / Respondent, or Father / Mother. |
| Which party is the husband? | Only when you chose a gendered pair. Sets which legal party carries which label. |
| Date of Marriage / Date of Filing | Optional. |
| Bates Prefix | The prefix on every Bates number (WHI → WHI001). Leave it blank and it is derived from the petitioner’s surname: four letters if the surname is longer than four, otherwise three, so Whitmore gives WHIT, not WHI. Type it in if you want something specific. |
- Click Create Case.
What good looks like
Section titled “What good looks like”The case opens with a workflow strip across the top — the four steps of a case, with the one you are on highlighted — and four tabs beneath it: Inventory, Accounts & owners, Deliverables, Case Details. Below that is an empty folder tree of the 22 standard categories, ready for documents.
Next: Uploading documents